How to Install a Bidet in 5 Easy Steps
Many homeowners in Australia and around the world are upgrading to bidet seats (or washlets) for better hygiene, comfort, and a touch of luxury. Unlike traditional bidets that require separate fixtures and plumbing, a modern bidet seat is designed to fit directly onto your existing toilet, making it a quick and practical upgrade.
Installing a bidet is simpler than most people expect. In fact, you can do it yourself in just five steps: shut off your toilet’s water supply, remove the old seat, connect a T-valve to the water line, mount your new bidet seat, and plug it into a nearby outlet. With only basic tools, the whole process can be done in under an hour.
Before we jump into the step-by-step guide, let’s quickly look at what a bidet actually is and why it’s such an easy upgrade.
What Is a Bidet?
A bidet is an easy and hygienic way to clean yourself after using the toilet, using a gentle stream of water for a fresher, more sanitary wash. While bidets were traditionally floor- or wall-mounted, there are now several types that can easily attach to your existing toilet.
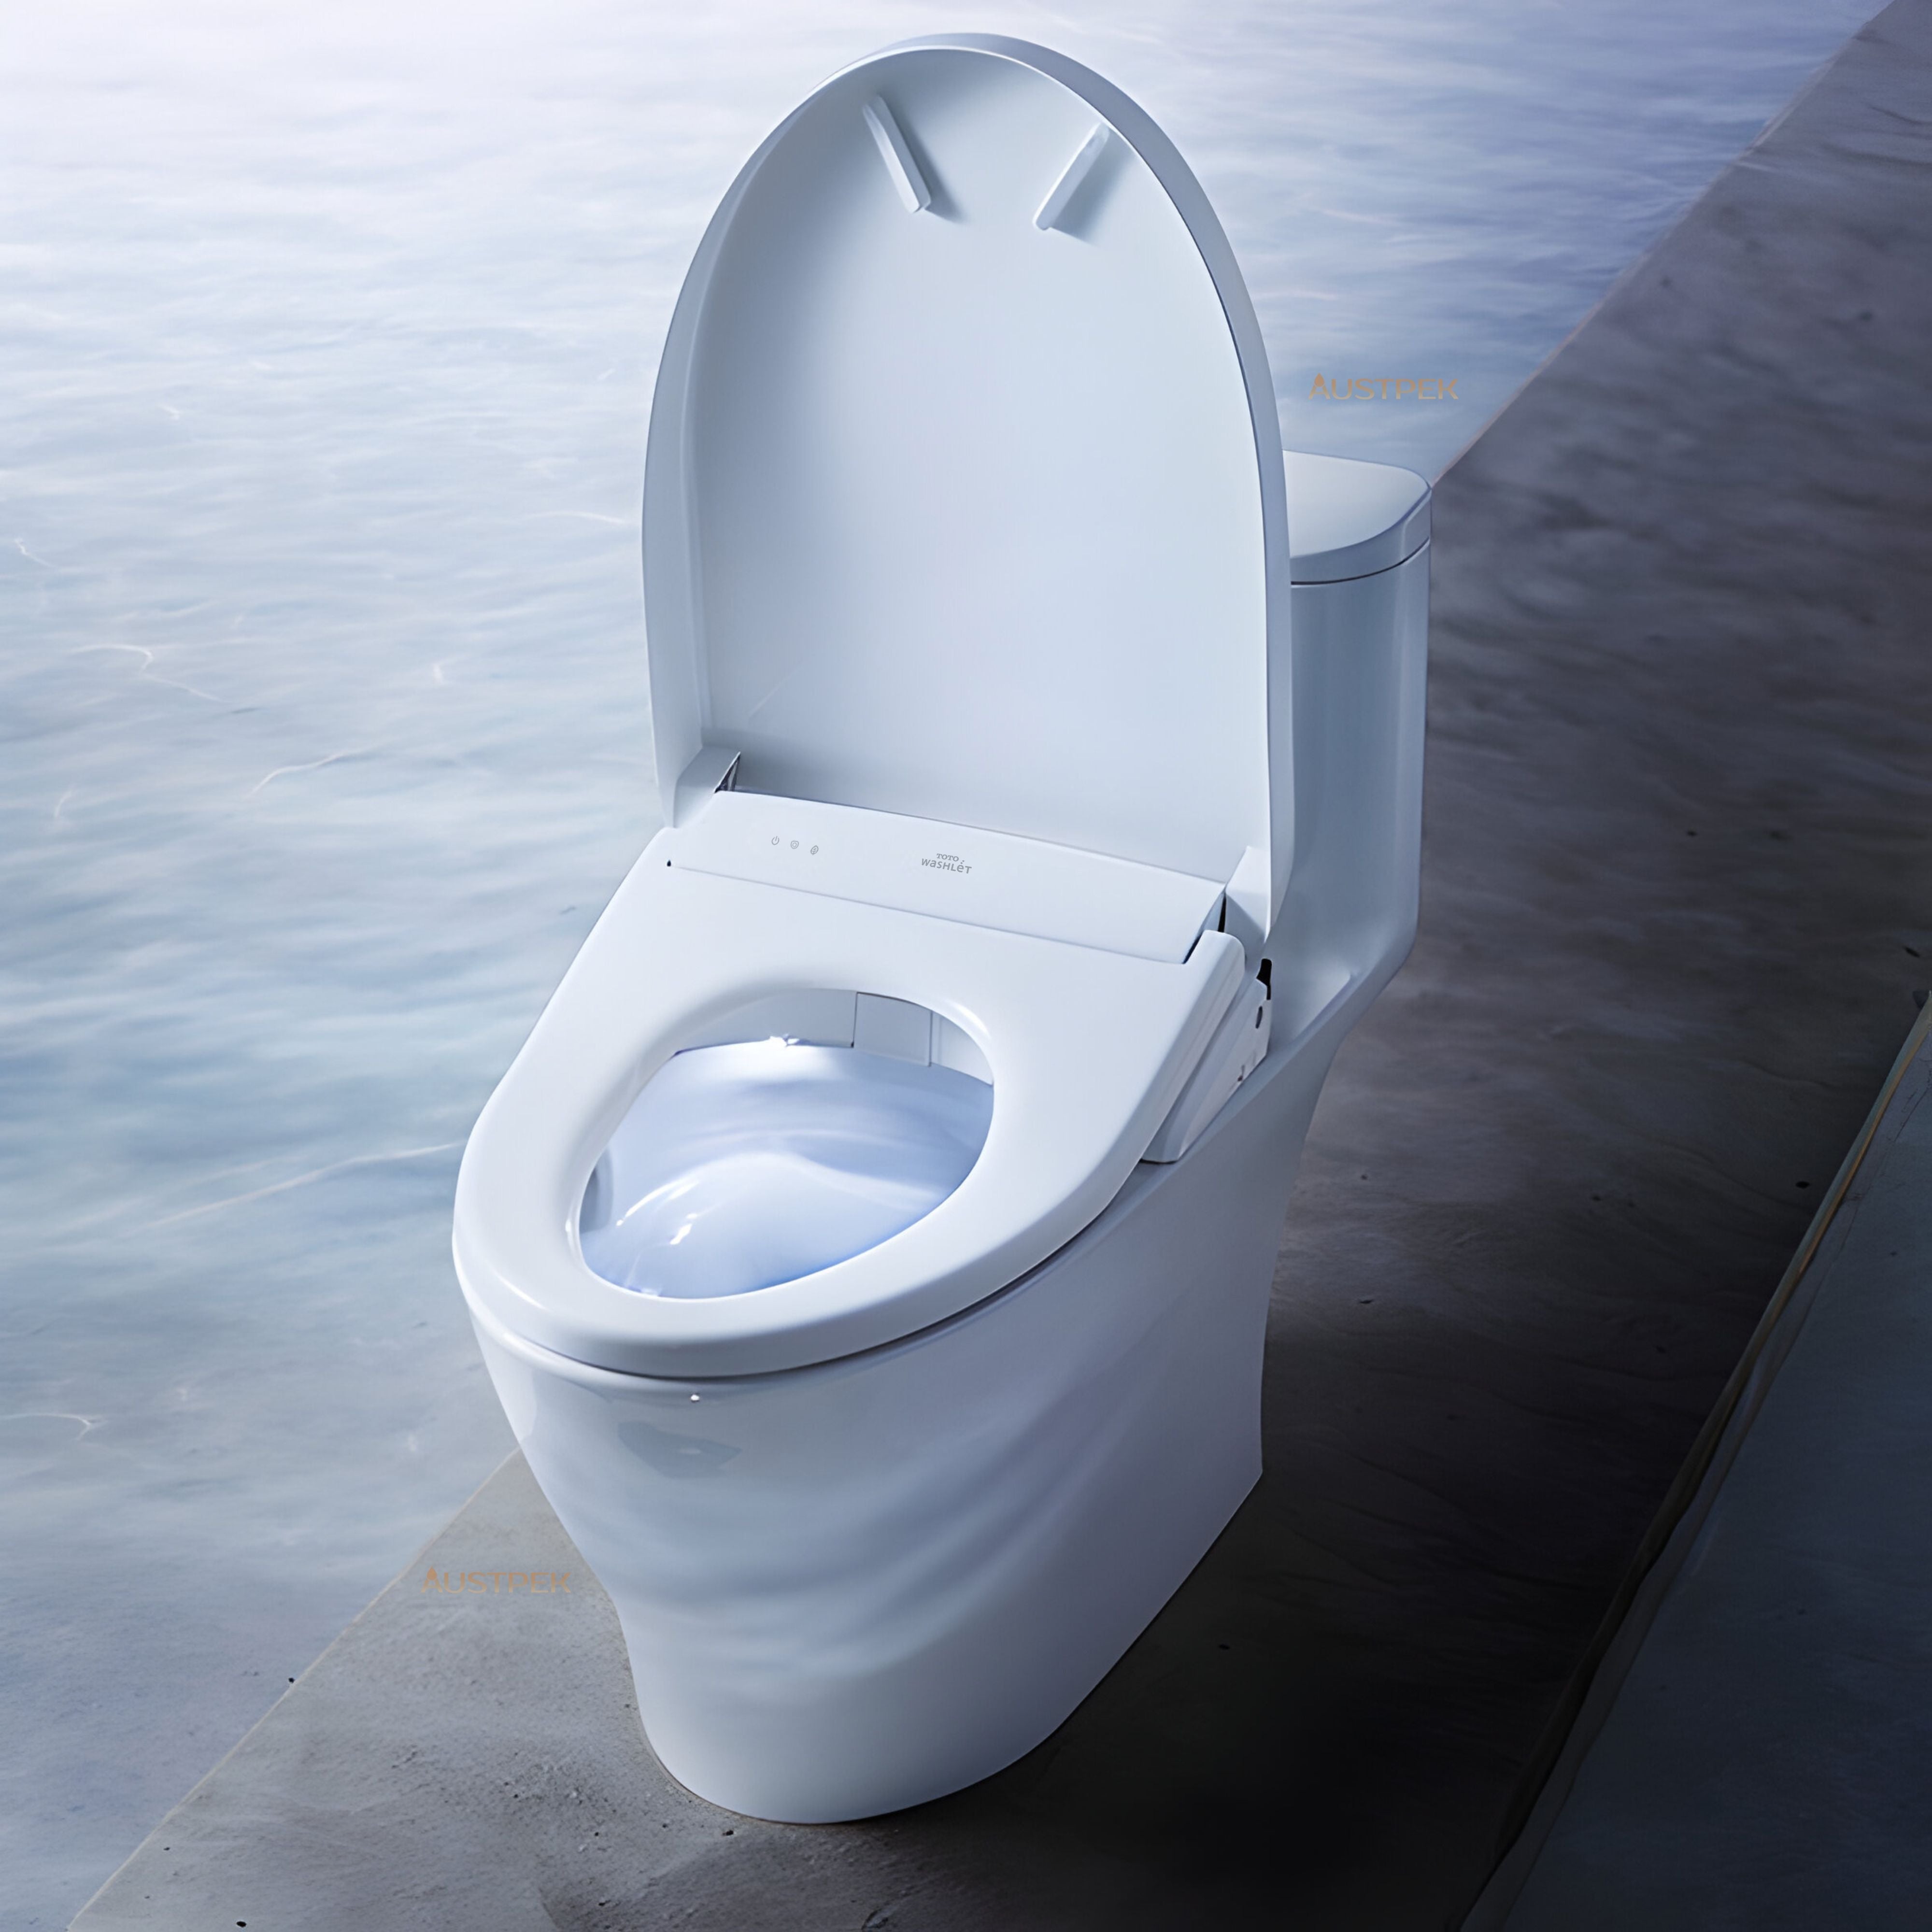
There are several types of bidets available in Australia, but in this guide, we’ll focus on the popular bidet seat, also known as a Washlet from TOTO. It’s convenient, easy to use, and simple enough to install yourself at home.
-
Handheld bidet sprayer (‘bum gun’) – A small nozzle attached to the toilet’s water line that you control manually for cleaning.
-
Stand-alone – A separate porcelain fixture next to the toilet that requires its own plumbing.
-
Bidet seat or Washlet – An electronic seat that replaces your existing toilet seat and provides automated washing, drying, and comfort features.
Shop TOTO Washlets
Tools You Will Need to Install a Bidet Seat
You only need a few basic tools to install a bidet. Most bidet kits come with everything else you need (a T-connector valve, hoses, and gaskets).
Tools |
Purpose |
|
Adjustable wrench |
Loosening/tightening water supply connections |
|
Screwdriver |
Removing/installing the toilet seat bolts |
|
Towel |
Catching any small drips of water |
|
Bucket (optional) |
To drain excess water when disconnecting lines |
|
Plumber’s tape (optional) |
Wrapping threads on water fittings for a tight, leak-free seal |
Installing the Bidet Seat or Washlets
Step 1: Turn Off the Water and Remove the Old Seat
Start by shutting off the water supply at the valve behind or below the toilet, then flush to drain the tank. Remove your existing toilet seat by unscrewing the bolts at the back, and keep a towel or bucket handy as a small amount of water may drip when you disconnect the water hose.
Step 2: Install the T-Valve on the Toilet’s Fill Line
Insert the rubber gasket into the T-valve nut, then screw the T-valve onto the toilet’s fill valve where the water supply hose was removed. Reattach the toilet’s water hose to the bottom outlet of the T-valve, while the second outlet will feed water to the bidet seat. This setup “splits” the water so both the toilet and bidet can operate.
Step 3: Mount the Bidet Seat
Place the bidet’s mounting plate onto the toilet, aligning it with the existing bolt holes. Insert the bolts and loosely secure them so you can adjust the seat later. Slide the bidet seat onto the mounting plate until it clicks into place, adjust the position if necessary, and then tighten the bolts so the seat sits firmly.
Step 4: Connect the Water and Power
Connect one end of the bidet hose to the water inlet on the seat, and the other end to the T-valve outlet. Turn the water supply back on slowly and check all connections for leaks. If your bidet is electric, plug it into a nearby GFCI-protected outlet.
Step 5: Test and Adjust
Run a wash cycle to test the spray and adjust the nozzle or seat position if needed. Check again for leaks and tighten any loose connections. Once everything works correctly, your bidet seat is fully installed and ready to use.
Upgrade Your Toilet with a Premium Bidet Seat
Installing a bidet seat is surprisingly fast and easy – most people can complete the five steps above in about an hour or two using just basic tools. There’s no major plumbing work: you simply shut off the water, add the T-connector, mount the seat, and reconnect the lines.
At Austpek Bathrooms we carry a full range of premium TOTO Washlet, complete with features like heated seats, warm-air dryers, and self-cleaning wands. Whether you’re looking for our most popular model or need help choosing the right one, our expert consultants are here to help.
Explore our range of premium bidet seats and contact our friendly team for personalised recommendations. If you’re planning a full upgrade, we also offer custom quotes for bundles like toilet and bidet combo, so you can create the perfect bathroom setup with ease.
Frequently Asked Questions
Can I add a bidet seat to my existing toilet?
- Absolutely. Most bidet seats are designed to fit standard round or elongated toilets, so you can simply replace your current seat and connect it to the existing water supply. There’s no need to buy a new toilet—the seat attaches directly to your current bowl.
Do I need a plumber to install a bidet seat?
- For basic models, some homeowners can install the seat themselves. However, for electric Washlets or models with advanced features, professional installation by a licensed plumber is recommended. This ensures your bidet is installed safely and correctly, and keeps your warranty valid, so you’re protected if anything goes wrong.
How long does it take to install a bidet?
- Installation time varies depending on the model. Simple, non-electric seats can often be fitted in 30–60 minutes, while more advanced Washlets may take a professional slightly longer to ensure everything is set up correctly.
What tools and parts will I need to install a bidet?
- Most bidet seats come with everything you need: hoses, T-valves, and mounting brackets. A screwdriver and adjustable wrench are usually required, and it’s handy to have a towel or small bucket to catch any drips.


